Consent
ThunderID provides built-in support for capturing user consent during the login flow. A lightweight default consent server is packed with the ThunderID distribution and is enabled by default to seamlessly handle consent approvals.
As of now, ThunderID only supports attribute consent.
Startup Flags
ThunderID automatically starts the default consent server when running the startup script. You can disable this behavior if you prefer to use an external consent server or want to run ThunderID without consent capabilities.
Zip distribution
For Zip distributions, you can pass the --without-consent flag when executing the startup script:
# Linux/macOS
./start.sh --without-consent

# Windows
./start.ps1 --without-consent
Docker distribution
For Docker or container-based deployments, you can disable the bundled consent server by setting the WITH_CONSENT environment variable to false (e.g., in your docker-compose.yml):
environment:
  - WITH_CONSENT=false
Server Configurations
ThunderID communicates with the consent server via a REST API. You can configure the connection details in the repository/conf/deployment.yaml file.
The default configuration block looks like this:
consent:
  enabled: true
  base_url: "http://localhost:9090/api/v1"
  timeout: 5
  max_retries: 3
enabled: Enable or disable consent functionality (default:true).base_url: The base URL of the consent server API (default:http://localhost:9090/api/v1).timeout: HTTP request timeout in seconds (default:5).max_retries: Maximum retry attempts for transient errors (default:3).
Attribute Consent in Login Flows
When users authenticate with an application that requires specific profile attributes, ThunderID can prompt them to consent to sharing specific attributes with the application.
Attribute consent requirements are driven by the requested attributes during application configuration. If an application requires specific user attributes (e.g., username, email), the user will be asked to grant consent before the login process completes.
Configuring Consent in Flows
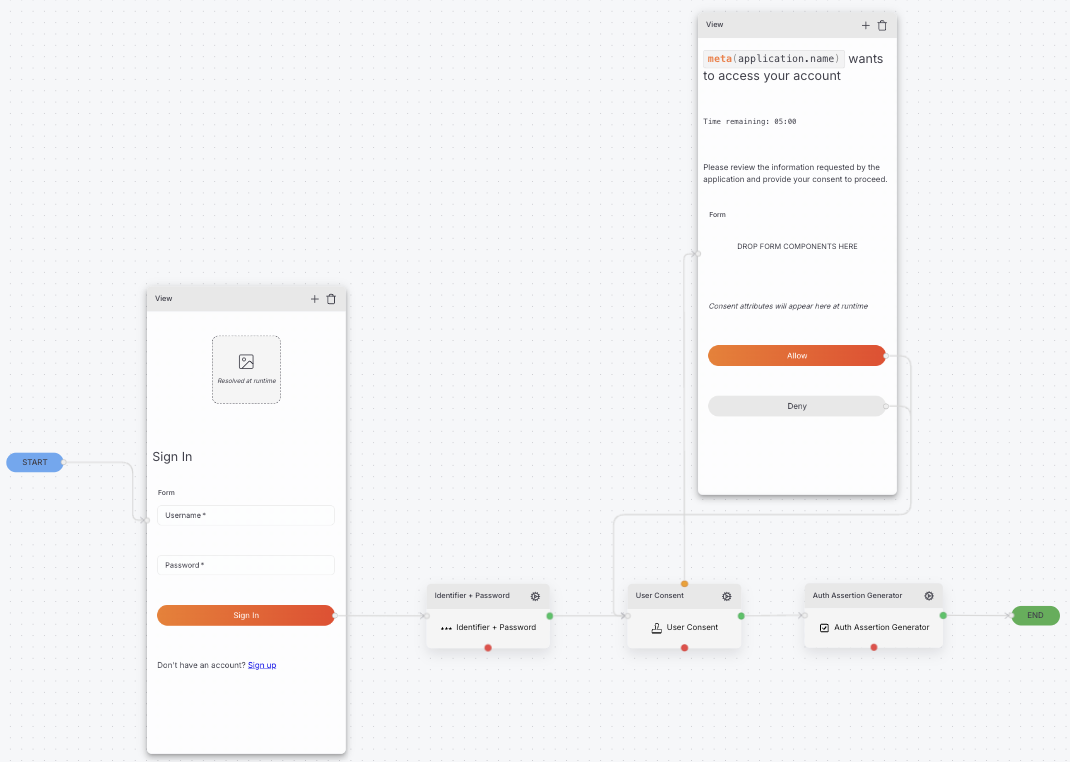
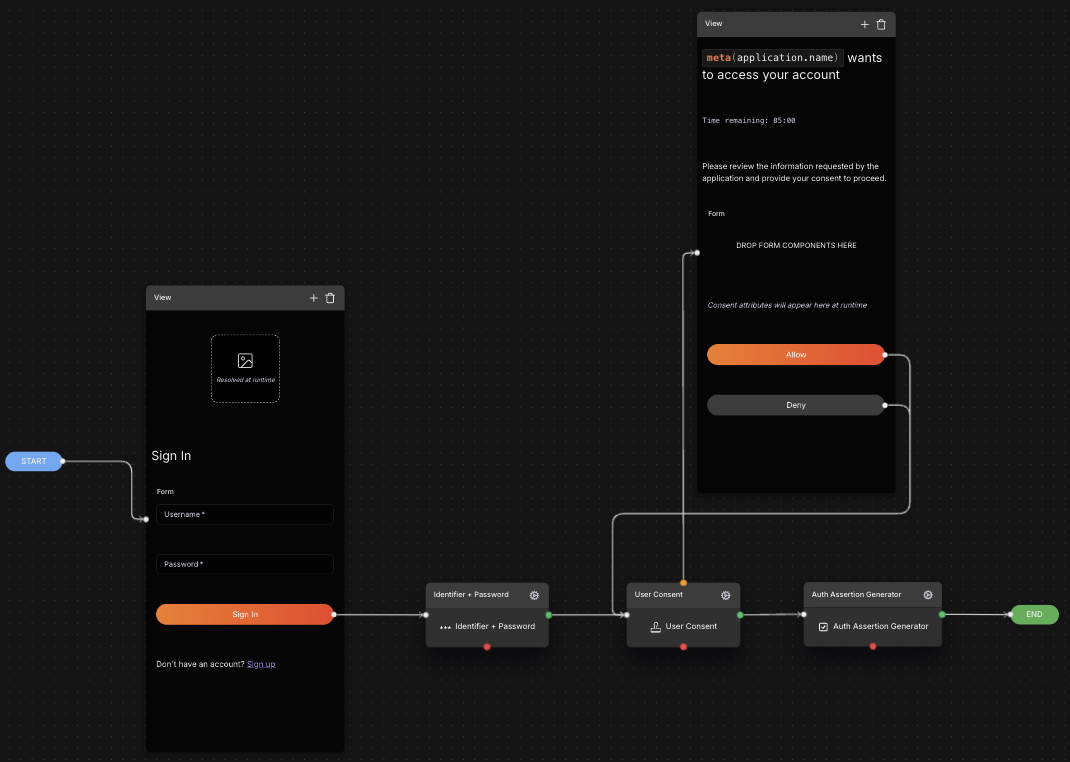
To enable the consent prompt during authentication flows, configure it within the ThunderID flow builder:
- Navigate to the Flows section in the ThunderID console and select the flow you want to update (e.g., the default login flow).
- In the flow builder, expand the Executors section and add the User Consent executor node. It should be placed after the necessary authentication steps and before the Auth Assert Generator node.
- Connect the
onSuccessedge of the preceding node to the input of the User Consent node, and then connect theonSuccessedge of the User Consent node to the next node in the flow (e.g., Auth Assert Generator). - Expand the Steps section and add the Consent View step to the flow. This step will render the consent page to the user during the login process.
- Connect the
onIncompleteedge of the User Consent node to the input of the Consent View step. - Then connect both Allow and Deny buttons in the Consent View step back to the User Consent node to handle user responses.
- Save the flow configuration.
Configure optional timeout for the user input
By default, the consent flow will wait indefinitely for the user to provide input. However, you can configure an optional timeout to automatically deny consent if the user does not respond within a specified time frame.
To set a timeout for user input in the consent flow:
- In the flow builder, select the User Consent node.
- In the node configuration panel, locate the Consent Timeout setting.
- Enter the desired timeout duration in seconds (e.g.,
60for a 1-minute timeout). - Expand the Components section, and drag and drop the Timer component into the Consent View step.
- Save the flow configuration.
Configure validity period for granted consent
By default, once a user grants consent, it remains valid indefinitely until the user revokes it. However, you can configure a validity period for granted consent to require users to re-consent after a certain duration.
Currently, this configuration is supported via the Application Management API. When creating or updating an application, you can define the validity period under the loginConsent section in the JSON payload.
Example request:
curl --location -X POST 'https://localhost:8090/applications' \
--header 'Content-Type: application/json' \
--header 'Accept: application/json' \
--data '{
    "name": "Your Application Name",
    "template": "browser",
    "authFlowId": "019d206c-1766-76e2-aaa5-5b311dee8de7",
    "assertion": {
        "validityPeriod": 3600
    },
    "loginConsent": {
        "validityPeriod": 120
    }
}'
validityPeriod is specified in seconds (e.g., 120 for a 2-minute validity period). After this period expires, the user will be prompted to grant consent again during the next login attempt.
Trying It Out
To verify the attribute consent flow using an application configured with consent requirements:
- Ensure that the consent server is running (if using the bundled server) and that the application is configured to request the necessary user attributes.
- Start the login process for the application (e.g., by accessing the application's login page).
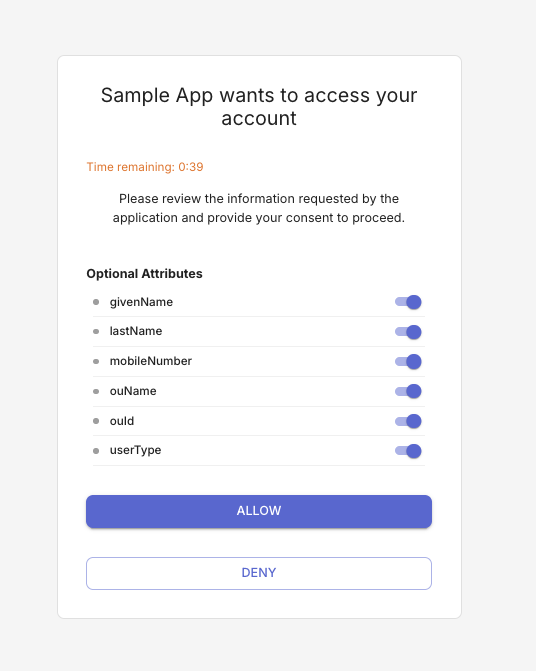
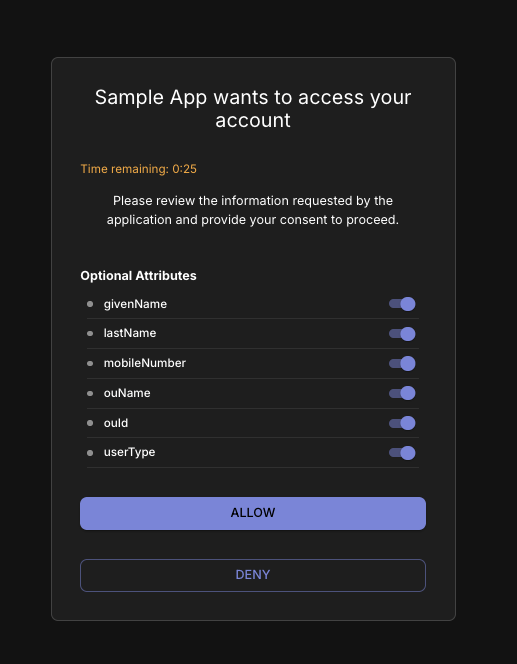
- After successful authentication, you should be presented with the consent page, prompting you to grant or deny consent for sharing the requested attributes with the application.
- Review the requested attributes and choose to either Allow or Deny consent.
- If you allow consent, the login process will complete successfully, and the application will receive the approved attributes. If you deny any essential attributes, the login process will be terminated.